Friday 7 March 2014

Chicken pasta bake

Chicken Pasta Bake

The pasta bake is made with a delicious cheesy tomato sauce and works perfectly with left over roast chicken as we made it. Actually it’s just as good without the chicken and will make a great side.

Chicken Pasta Bake Recipe macaroni bake

This secret to this dish is the tomato sauce which brings everything together. To get more intensity and flavour we oven roasted the tomatoes with thyme, salt and olive oil for an hour before blending and adding to the sauce. This really concentrates the flavour of the tomatoes and gives them a great kick in flavour (essential for UK tomatoes which are bland at the best of times).

Chicken Pasta Bake Recipe macaroni bake

Once the tomato sauce was ready we blended it again to get a smooth creamy finish. Spoon of Philadelphia cheese and some red Leicester and the sauce is ready. Simple combine with pasta and bake topped with mozzarella and Parmesan cheese.
Chicken Pasta Bake
Prep time
Cook time
Total time
A simple pasta tray bake with a creamy tomato sauce with basil and left over chicken
Recipe type: Main
Cuisine: Italian
Serves: 2 -4 persons
Ingredients
For The Oven Roastem Tomatoes
  • 4 Tomatoes, halved
  • Sea/Rock Salt
  • Thyme
  • Olive Oil
For the Tomato Sauce
  • 1 medium onion, chopped
  • 1 clove garlic, minced
  • ½ tsp dried chilli flakes (optional or reduce amount)
  • ½ tsp tomato puree
  • 100 ml Marasala (optional)
  • 1 tsp brown sugar
  • 4 Oven Roasted tomatoes (above) puréed
  • 250g tomato passata or 1 tin chopped tomatoes
  • ½ cup water
  • salt and pepper to taste
  • 1 tsp dried oregano
  • ½ tsp dried basil
  • ¼ tsp dried thyme
  • Large handful of fresh basil, roughly chopped
  • 1 large teaspoon cream cheese
  • 1 heaped handful of red Leicester cheese (or cheddar cheese)
Other Ingredients
  • 250g Penne, Macaroni or other Pasta (we used Macaroni)
  • Cooked chicken pieces
  • 125g mozarella cheese
  • 50g parmesan cheese
Instructions
Roast the tomatoes
  1. Halve the tomatoes, springle with salt, fresh thyme and olive oil.
  2. Roast in a medium/hot oven (180 Degrees C) for approximately 45 minutes to 1 hour
  3. Allow to cool then puree in a blender
    oven roast the tomatoes ready for the pasta bake sauce
Prepare the pasta
  1. Cook the pasta in boiling salted water according the the pack instructions. Leave slightly Al dente (about 2 minutes from full cooking time as it will bake in the sauce).
  2. Sieve and drizzle and mix with olive oil to stop the pasta sticking together
    Cook the pasta ready for the pasta bake
Prepare the tomato sauce
  1. Warm 2 tbsp olive oil and add the onions. Soften for about 5 minutes
  2. Add the garlic and fry for a further 1 minute
  3. Add the dry chilli flakes and the tomato puree and fry for 1 minute
  4. Add the Marsala wine and allow to cook off for a further minute
    Fry the onions and garlic for the pasta bake recipe
  5. Add the pureed roasted tomatoes, passata, water, sugar, oregano, basil and thyme
  6. Stir well and taste for seasoning then decide how much salt and pepper to add
    Add the roasted tomatoes - chicken Pasta bake recipe
  7. Allow the sauce to cook and reduce for about 10-15 minutes until it has thickened up a bit (dont let it get too thick, if it does, add more water)
  8. Turn off the heat and allow to cool slightly, then blend until smooth
  9. Return the blended tomato sauce back to the pan and turn on the heat.
  10. Once back to temperature add the 2 cheeses and stir well until the cheese has melted and the sauce is creamy.
    Puree the sauce then add the Philadelphia cheese and cheddar cheese = chicken pasta bake recipe
  11. Take off one or two ladles of sauce and set aside for topping later
  12. Add the chicken, basil and stir through.
  13. Add the pasta and mix well
  14. Fill your baking dish with the pasta mixture then top with the remaining sauce
  15. Liberally sprinkle over the mozzarella, followed by the parmesan
  16. Bake for 10-20 minutes on a medium oven until the cheese has melted and is golden.
    bake the chicken pasta bake recipe
  17. Finally sprinkle over a few more roughly chopped pieces of basil and serve alone or as a side dish

Chicken Pasta Bake Recipe

Follow Me on Pinterest
2K+

Saturday 9 March 2013

Rava Ladoo-Rava Laddu Recipe-Diwali Sweets Recipe

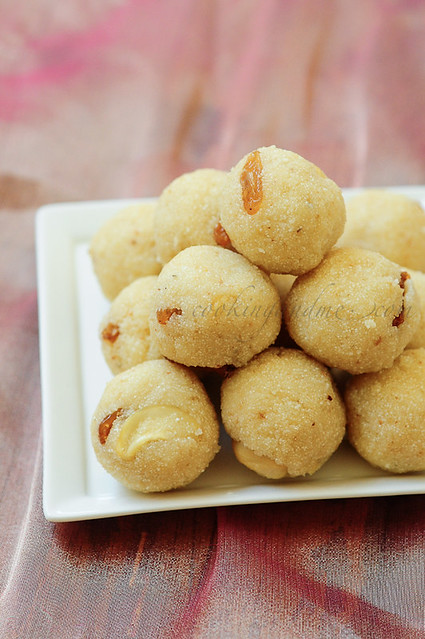
Rava Ladoo (or Rava Laddu) is a great Diwali sweet recipe for last-minute-preparation people like me. I am invited to two homes this Diwali and wanted to take some homemade Diwali sweets with me. When searching online, I chanced upon this very easy-looking Rava Ladoo recipe by Vahchef and zeroed in on it. I had all the ingredients for the rava ladoo in hand so that made the job even easier.

Rava Ladoo-Rava Laddu Recipe-Diwali Sweets Recipe
Making traditional sweets for Diwali is a joy in itself and admittedly I have been very slack with it in the past few years. This year has been a bit different and hopefully it changes a bit more for the better the coming year.

Rava Ladoo-Rava Laddu Recipe-Diwali Sweets Recipe

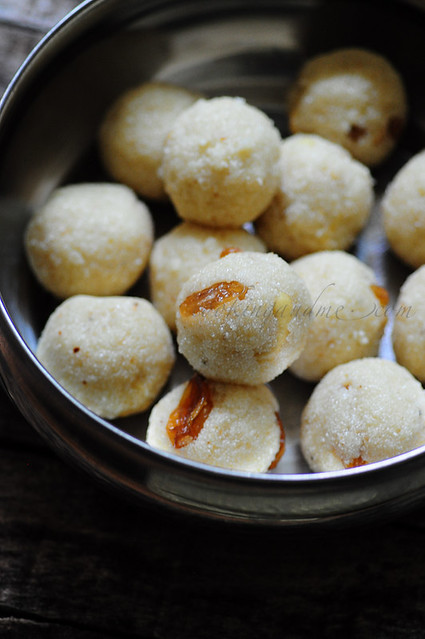
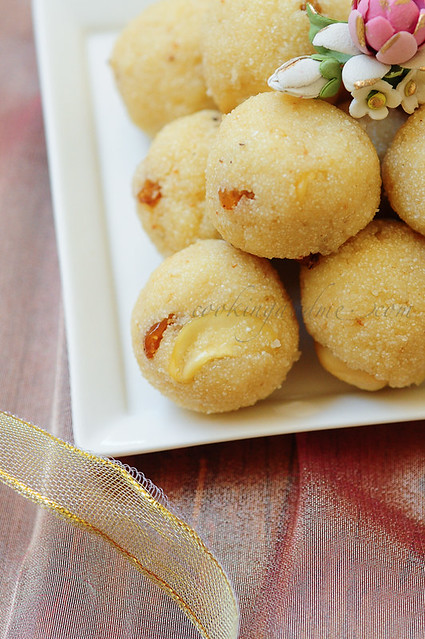
The lighting in the first picture is a bit misleading so I wanted to upload the picture above to show you the actual colour of rava laddus. They came together in less than 20 mins and are sitting on the counter cooling as I type this.

Rava Ladoo-Rava Laddu Recipe-Diwali Sweets Recipe

Preparation time: 5 minutes
Cooking time: 15 minutes
Makes 12 rava ladoos
Recipe adapted from: Vahchef

Ingredients for Rava Ladoo:
1 cup of rava / sooji / semolina, the fine kind
2 tbsp of ghee (how to make ghee at home)
A handful of raisins and cashew nuts
1/2 cup of grated coconut
1/4 cup of sugar
1/3 cup of milk
A generous pinch of cardamom powder

How to Make Rava Ladoo (Rava Laddu):

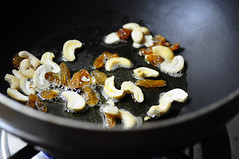
1. Heat the ghee in a pan and add the cashew nuts and raisins. IMP - keep the flame low throughout the process of making rava ladoo.
Rava Ladoo-Rava Laddu Recipe-Diwali Sweets Recipe
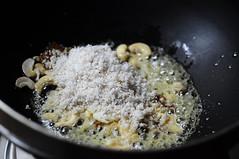
2. Grind the coconut and cardamom together. This is an optional step but I did it since my grated coconut was very coarse and I was worried it won't be easy to make the ladoos into balls.

Add the coconut-cardamom mixture to the roasting nuts and raisins.
Rava Ladoo-Rava Laddu Recipe-Diwali Sweets Recipe
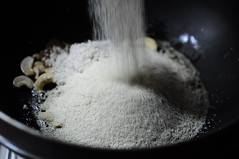
3. Mix ones and add the rava next.
Rava Ladoo-Rava Laddu Recipe-Diwali Sweets Recipe
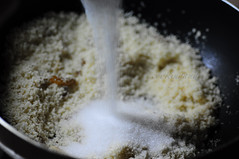
5. Fry this mixture for 2-3 mins and then add the sugar. Since my sugar was very fine, I didn't powder it but you can do so if you wish.
Rava Ladoo-Rava Laddu Recipe-Diwali Sweets Recipe
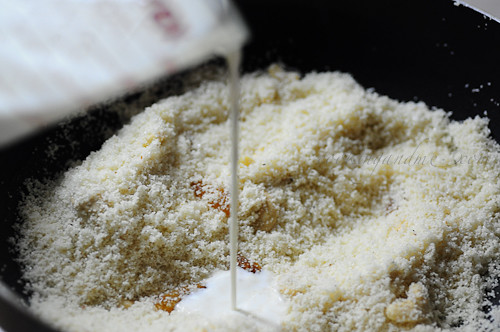
6. Continue to roast the rava mixture until the colour changes to a light brown. Don't let it sit and walk away or the rava will start toasting and turning a golden brown on one side. The process of roasting the rava took me about 5-6 mins. Once the rava is browned lightly, turn off the flame and slowly add the milk, stirring continuously as you do so. If you are a food blogger, it's ok to stop mixing and take a quick shot before you continue, but don't let it be for too long.
Rava Ladoo-Rava Laddu Recipe-Diwali Sweets Recipe
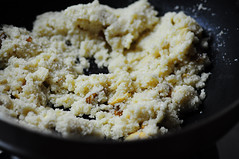
Once all the milk is added, continue to mix until the ladoo mixture comes together. It will be quite moist and will stick around your ladle.
Rava Ladoo-Rava Laddu Recipe-Diwali Sweets Recipe
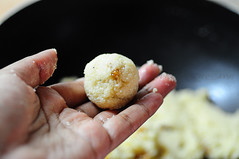
7. When the ladoo mixture is warm enough to handle, make into lemon-sized balls and gently set aside. If the mixture is too dry, sprinkle water or milk as you shape the ladoos.
Rava Ladoo-Rava Laddu Recipe-Diwali Sweets Recipe
Done! As I said, the entire process of making rava laddu took me no longer than 20 minutes and I got 12 medium-sized ladoos from this quantity.
Rava Ladoo-Rava Laddu Recipe-Diwali Sweets Recipe

Notes:

- you can add more coconut if you wish, up to 1 cup

- instead of using milk, you can use water or a mix of water and milk. If using only water, that will increase the shelf life of the rava ladoo.

- adjust sugar to your preference. This measure gives you a mildly sweet rava ladoo.

- this recipe gives you soft ladoos. If you prefer the firmer ones, decrease the amount of milk / water.

Share the rava ladoos (rava laddu) with your friends and family this Diwali and enjoy!

Wednesday 15 August 2012


Indian Style Mushroom Potato Curry recipe is a modified version of western Mushroom recipes. Curried Mushroom can be made dry by decreasing the amount of water. The dish is really simple to make and can be made more spicy by increasing the quantity of Red Chili Powder. Simple Creamy Curry can be served with rice or Indian Chapati.

Ingredients for Mushroom Curry :

200 gms. mushrooms (try whole button mushrooms)
2 potatoes
1 onion
1 tomato
1 t-spoon ginger paste (Adrak)
1 t-spoon garlic paste (Lahsun)
1/2 t-spoon cumin, powdered (jeera)
1/2 t-spoon turmeric (haldi)
1/2 t-spoon coriander (pisa dhaniya)
1/4 t-spoon chili powder (Lal Mirch)
4 table-spoon oil
1 t-spoon salt or to taste

How to make Mushroom Curry :

  • Boil potatoes in a pressure cooker, peel them and cut into small cubes. Make a puree of tomato and onion separately using a blender.
  • Heat oil in a medium size pan. Add onion paste to it, stir frequently, keep the flame to medium and cook the mixture till golden brown
  • After 4-5 minutes add tomato puree, ginger, garlic paste, coriander, cumin, turmeric and chili powder. Stir well and cook further for 2 minutes on low heat.
  • Add mushrooms and potatoes, season with salt and cook further on low heat for 5 mins.
  • Add 1/2 to 1 cup of water to the pan as you desire. Cook until mushrooms gets properly cooked and you get the desired thick curry.
  • Serve Mushroom Curry hot with rice or chapati.
Note:- To keep the mushroom curry dry, don't add much water to the mixture.

Saturday 14 July 2012

Hyderabadi Chicken Dum Biryani


Hyderabadi Chicken Dum Biryani

Biryani! Doesn’t that word conjure feelings of joy and comfort? Who doesn’t love this pampered, fragrant, rice delicacy that reigns supreme as the world best one pot meal?
hyderabadi-chicken-dum-biryani
Hyderabadi Chicken Dum Biryani

For many of my dear readers, today’s post is a long awaited one. At last I got to blog the recipe of the quintessential ‘home style’ Chicken Dum Biryani from the royal kitchen of the Nizams. A dish that calls for an elaborate process and requires lots of TLC aka ‘tender loving care’ while preparing unlike the quick pressure cooker biryani. There are two versions, Kachha (raw) and Pakki (cooked) Biryani. Today’s recipe is basically a Hyderabadi kachha style of biryani where marinated raw chicken and partially cooked basmati rice are layered and cooked on dum, over low heat. I prepared this biryani a couple of times, the recipe is perfect and has never failed me. Once the biryani is cooked on dum, as you open the lid, the kitchen smells fragrant, rich with the reassuring aroma of pure ghee and saffron and the chicken cooked to melt in the mouth tenderness.


chicken-dum-biryani
Chicken Dum Biryani

A few things to keep in mind while preparing biryani. Use best quality aged Basmati rice, good quality chicken and the best saffron available. Marinate chicken for at least 4-6 hrs and if running out of time then two hours will do. No short cut methods and all the ingredients listed below are a MUST, in other words, there are no substitutes for the mentioned ingredients.
marinated-chickencooked-rice
Marinated Chicken ~ Partially cooked basmati rice
caramalized-onionssaffron-milk
Caramelized Onions ~ Saffron Milk
Hyderabadi Chicken Dum Biryani Recipe
Marination: 4 hrs Prep & Cooking: 1 hr
Serves 6-7 persons
.
Ingredients:
1 kg chicken, washed and drained completely
2 large onions, finely sliced
2 tbsps chopped coriander leaves
1 tsp saffron
1/2 cup luke warm milk
salt to taste
2 tbsps ghee + 5 tbsps oil
For marination:
3/4 cup thick curd/yogurt
8-10 green chillis, make a small slit in them
1 1/2 tbsps ginger garlic paste
1 tbsp red chilli pwd (adjust)
1/4 tsp turmeric pwd
3/4 tbsp coriander pwd
1/2 cup chopped coriander leaves
3/4 cup pudina leaves
juice of 1 lemon
1 3/4 tsps salt
Biryani masala, make pwd:
8 cloves
1″ cinnamon stick
4 elaichi/cardamom
3/4 tsp shah jeera
12 pepper corns
Ingredients to cook rice:
4 cups Basmati rice
6 cloves
3 cardamoms
1″ cinnamon stick
3 bay leaves
1 marathi mogga
1 star anise
10 mint leaves
1 tbsp oil
1 1/2 tbsps salt
water as required
1 Marinate chicken with the ingredients called for ‘marination’ along with biryani masala pwd. Keep aside for 4 hrs or a min of 1 1/2 hrs. While the chicken is marinating, work on the rest of the preparation.
2 Cook basmati rice in lots of water along with bay leaves, cloves, cinnamon, cardamom, marathi mogga, elaichi, oil, salt till its half cooked. Strain the water and spread the rice on a large wide plate. Allow to cool.
3 Heat 1 tbsp oil + 1 tbsp ghee in a vessel, add sliced onions, saute for 8-10 mts till caramelized. Remove and keep aside.
4 Add the saffron to the luke warm milk and combine well. Keep aside.
5 Take a wide deep vessel to prepare the biryani. Add 3 tbsps oil, add the marinated chicken and spread out over the vessel. Cook on high for 2 mts. Add a tbsp of oil over the chicken pieces. Reduce flame.
6 Spread half of the rice over the chicken layer, pour half a tbsp of ghee all over the rice, add half of the caramalized onions and spread over the rice. Next sprinkle a tbsp of coriander leaves and pour about one fourth cup of saffron milk over the rice. Over this layer, spread the remaining rice. Again pour half a tbsp of ghee all over, add remaining caramelized onions and spread over the rice. Finally sprinkle a tbsp of coriander leaves and pour remaining saffron milk over the rice.
7 Place lid and over the lid place a heavy weight and seal the edges with wheat dough. Cook on high flame for 2 mts. Remove the vessel from the stove and place a iron tawa. Allow to heat. Reduce to low flame and place back the biryani vessel on the iron tawa and cook biryani for 20-25 mts. Turn off heat and do not remove lid for 10 mts.
8 After 10 mts, remove lid, combine gently and serve hot with raita and curry of your choice.

chicken-biryani-korma
Our Sunday meal ~ Chicken Dum Biryani, Nilgiri Chicken Korma and Raita

Hyderabadi Chicken Dum Biryani Recipe

Prep time: 30 min
Cook time: 60 min
Yield: 5
Main Ingredients: rice, chicken


Biryani! Doesn’t that word conjure feelings of joy and comfort? Who doesn’t love this pampered, fragrant, rice delicacy that reigns supreme as the world best one pot meal?

Thursday 22 December 2011


Pachi Pulusu


This is a traditional Andhra recipe from my hubby's hometown . Even my mom use to prepare  but i started liking it more after my marriage .I first had a taste of this recipe after marriage and the tanginess of the tamarind, the heat of the chillies and the crispiness of the onions bowled me over. It's very simple to prepare, it took me hardly 10 minutes to put it together. It can be had with rice or by itself as a soup or rasam.


Ingredients:

Tamarind - 1 big lemon sized ball
Onion - 1/2 of a big one - Finely Chopped
Green Chillies - 2 Split
Jaggery/ Sugar - A pinch

salt 

coriander  
Dry Red Chillies - 2

Seasoning:

Mustard Seeds - 1 Teaspoon
Curry Leaves - 5 - 6
Jeera - 1 Teaspoon


Oil - 2 Teaspoons
Method:

Soak tamarind in 3 cups of water along with salt. Extract the juice and discard the pulp. Add the onions, green chillies and salt,coriander  to the tamarind juice.

Heat oil and add red chillies,mustard seeds. After they splutter, add jeera and curry leaves. Pour this seasoning over the tamarind mixture. Add a pinch of jaggery. Let it stand for 30 minutes before serving.


Tuesday 6 December 2011

Salmon fish fry

Hi
  For the first time  i prepared fish after my marriage and surprisingly it came out very good and now salmon has became one of my fav recipe.


Ingredients for Simple Salmon Fry Recipe
Salmon - 1 lb
(cut into small)
Turmeric powder - 1/4 tsp
Salt - As reqd
Lime - 1/2 pc
Red chilly powder - 1 tsp
oil
coriander-1

Preparation Method of Simple Salmon Fry Recipe1

Squeeze the lime over the salmon.
Mix little water and other ingredients to make a paste.
Marinate the salmon with the above paste for 10 - 20 mins.

Now is the fun bit: using your hands - make sure that each fish piece is thoroughly coated with the spice mixture - ensuring that the powder dows not "clump" together at all - use the fish pieces to evenly mix the spice/lemon-juice/oil mixture. Then finally - place the fish pieces "face down" - i.e. skin side up and cover the dish with clingfilm. Place this in the fridge for an hour or two - that will give you plenty of time to get on with other things that you need to do.

When you come back - get a large frying pan - and pour in a few drops of olive oil - and get the flame going high to get the pan really hot. If you have an extractor fan above your hob - you should get that going on max as well. Then - when the pan is real hot - place the fish pieces in - skin-side down - and let them stay in the pan for a few minutes - sizzling away. Shake the pan horizontally slightly (but not too much) - just to ensure that the pieces don't stick and burn on the surface of the pan. It helps to use non-stick frying pan for this method.

After about 6 mins - use a spatula or tongs to carefully turn over each fish piece so that the skin-side is now up. You can see that it is beginning to look quite good now. You may reduce the heat a bit at this point - because by cooking the fish on high heat with skin-side down you have actually very gently cooked the fish right up to the top of the fish - and all you want to do now is to brown the top. However - be warned if you follow these instructions the salmon will be very tender and "just-cooked" in the middle
Pour some light oil (like Sunflower Oil ) in a flat pan and stir fry.

:- Serve hot with coriander ,onions and lemon.


Carrot halwa

Celebrating my 1st Engagement  anniversary with our tradional Indian sweet "Gajar ka Halwa".Actually i did thought to post this about a week ago, BUT.. last week was bit busy.
                  Now something about this carrot pudding or carrot halwa,which is the most famous of
 Indian sweet dishes. It origiantes in the northern parts of India. As kids we always had this made from the RED long variety of carrots, which grows in the cooler climates of India (mostly north) and are available only during the winter months. They are juicier and naturally very sweet so halwa made from them is more carrot and less sugar and tasted real heavenly. If anyone can get red carrots, should definately try making the halwa with them.
But everywhere else we get these orange carrots only,and halwa tastes delicious with them too.
                        This is  is one of my favorite Halwa.........................................:)
Ingredients:

Shredded carrot 2 cups
Milk 2 cups
Sugar 1/4 + cup
Cardamom powder 1/2 teaspoon
Unsalted butter/ghee 2 tablespoons
Cashews, raisins, almonds to garnish

Method:
Roast the cashews and raisins in a little ghee and keep it aside.
Boil the milk until it gets reduced to half.This should be done in medium high heat for about 8 to 9 minutes stirring occasionally so that it does not stick to the pan.
In a nonstick pan melt the butter and stir fry the shredded carrot on medium heat for about 5 to 6 minutes so that the carrots leave the raw smell and slightly change the colour..Take care the carrots do not get burnt.
Add the evaporated milk and cook for about 10 minutes until the milk gets completely absorbed.
Add the sugar and stir well.Cook for 3 more minutes and add the cardamom powder and cook till the halwa starts leaving the sides of the pan and the ghee starts oozing out.

Garnish with the roasted cashews and raisins.